Integrate Data with Apache Kafka and Apache Flink
This document describes how to replicate TiDB data to Apache Kafka and Apache Flink using TiCDC. The organization of this document is as follows:
- Quickly deploy a TiDB cluster with TiCDC included, and create a Kafka cluster and a Flink cluster.
- Create a changefeed that replicates data from TiDB to Kafka.
- Write data to TiDB using go-tpc.
- Observe data on Kafka console consumer and check that the data is replicated to a specified Kafka topic.
- (Optional) Configure the Flink cluster to consume Kafka data.
The preceding steps are performed in a lab environment. You can also deploy a cluster in a production environment by referring to these steps.
Step 1. Set up the environment
Deploy a TiDB cluster with TiCDC included.
In a lab or testing environment, you can deploy a TiDB cluster with TiCDC included quickly by using TiUP Playground.
tiup playground --host 0.0.0.0 --db 1 --pd 1 --kv 1 --tiflash 0 --ticdc 1
# View cluster status
tiup status
If TiUP is not installed yet, refer to Install TiUP. In a production environment, you can deploy a TiCDC as instructed in Deploy TiCDC.
Create a Kafka cluster.
- Lab environment: refer to Apache Kakfa Quickstart to start a Kafka cluster.
- Production environment: refer to Running Kafka in Production to deploy a Kafka production cluster.
(Optional) Create a Flink cluster.
- Lab environment: refer to Apache Flink First steps to start a Flink cluster.
- Production environment: refer to Apache Kafka Deployment to deploy a Flink production cluster.
Step 2. Create a Kafka changefeed
Create a changefeed configuration file.
As required by Flink, incremental data of each table must be sent to an independent topic, and a partition must be dispatched for each event based on the primary key value. Therefore, you need to create a changefeed configuration file
changefeed.confwith the following contents:[sink] dispatchers = [ {matcher = ['*.*'], topic = "tidb_{schema}_{table}", partition="index-value"}, ]For detailed description of
dispatchersin the configuration file, see Customize the rules for Topic and Partition dispatchers of Kafka Sink.Create a changefeed to replicate incremental data to Kafka:
tiup ctl:<cluster-version> cdc changefeed create --server="http://127.0.0.1:8300" --sink-uri="kafka://127.0.0.1:9092/kafka-topic-name?protocol=canal-json" --changefeed-id="kafka-changefeed" --config="changefeed.conf"If the changefeed is successfully created, changefeed information, such as changefeed ID, is displayed, as shown below:
Create changefeed successfully!
ID: kafka-changefeed
Info: {... changfeed info json struct ...}
If no result is returned after you run the command, check the network connectivity between the server where you run the command and the Kafka machine specified in the sink URI.
In a production environment, a Kafka cluster has multiple broker nodes. Therefore, you can add the addresses of multiple brokers to the sink UIR. This ensures stable access to the Kafka cluster. When the Kafka cluster is down, the changefeed still works. Suppose that a Kafka cluster has three broker nodes, with IP addresses being 127.0.0.1:9092, 127.0.0.2:9092, and 127.0.0.3:9092, respectively. You can create a changefeed with the following sink URI.
tiup ctl:<cluster-version> cdc changefeed create --server="http://127.0.0.1:8300" --sink-uri="kafka://127.0.0.1:9092,127.0.0.2:9092,127.0.0.3:9092/kafka-topic-name?protocol=canal-json&partition-num=3&replication-factor=1&max-message-bytes=1048576" --config="changefeed.conf"After creating the changefeed, run the following command to check the changefeed status:
tiup ctl:<cluster-version> cdc changefeed list --server="http://127.0.0.1:8300"You can refer to Manage TiCDC Changefeeds to manage the changefeed.
Step 3. Write data to generate change logs
After the preceding steps are done, TiCDC sends change logs of incremental data in the TiDB cluster to Kafka. This section describes how to write data into TiDB to generate change logs.
Simulate service workload.
To generate change logs in a lab environment, you can use go-tpc to write data to the TiDB cluster. Specifically, run the following command to use TiUP bench to create a
tpccdatabase and write data to this new database.tiup bench tpcc -H 127.0.0.1 -P 4000 -D tpcc --warehouses 4 prepare tiup bench tpcc -H 127.0.0.1 -P 4000 -D tpcc --warehouses 4 run --time 300sFor more details about go-tpc, refer to How to Run TPC-C Test on TiDB.
Consume data in the Kafka topic.
When a changefeed works normally, it writes data to the Kafka topic. Run
kafka-console-consumer.sh. You can see that data is successfully written to the Kafka topic../bin/kafka-console-consumer.sh --bootstrap-server 127.0.0.1:9092 --from-beginning --topic `${topic-name}`
At this time, incremental data of the TiDB database is successfully replicated to Kafka. Next, you can use Flink to consume Kafka data. Alternatively, you can develop a Kafka consumer client yourself for specific service scenarios.
(Optional) Step 4. Configure Flink to consume Kafka data
Install a Flink Kafka connector.
In the Flink ecosystem, a Flink Kafka connector is used to consume Kafka data and output data to Flink. However, Flink Kafka connectors are not automatically installed. To use it, add a Flink Kafka connector and its dependencies to the Flink installation directory after installing Flink. Specifically, download the following jar files to the
libdirectory of the Flink installation directory. If you have already run the Flink cluster, restart it to load the new plugin.Create a table.
In the directory where Flink is installed, run the following command to start the Flink SQL client:
[root@flink flink-1.15.0]# ./bin/sql-client.shThen, run the following command to create a table named
tpcc_orders.CREATE TABLE tpcc_orders ( o_id INTEGER, o_d_id INTEGER, o_w_id INTEGER, o_c_id INTEGER, o_entry_d STRING, o_carrier_id INTEGER, o_ol_cnt INTEGER, o_all_local INTEGER ) WITH ( 'connector' = 'kafka', 'topic' = 'tidb_tpcc_orders', 'properties.bootstrap.servers' = '127.0.0.1:9092', 'properties.group.id' = 'testGroup', 'format' = 'canal-json', 'scan.startup.mode' = 'earliest-offset', 'properties.auto.offset.reset' = 'earliest' )Replace
topicandproperties.bootstrap.serverswith the actual values in the environment.Query data of the table.
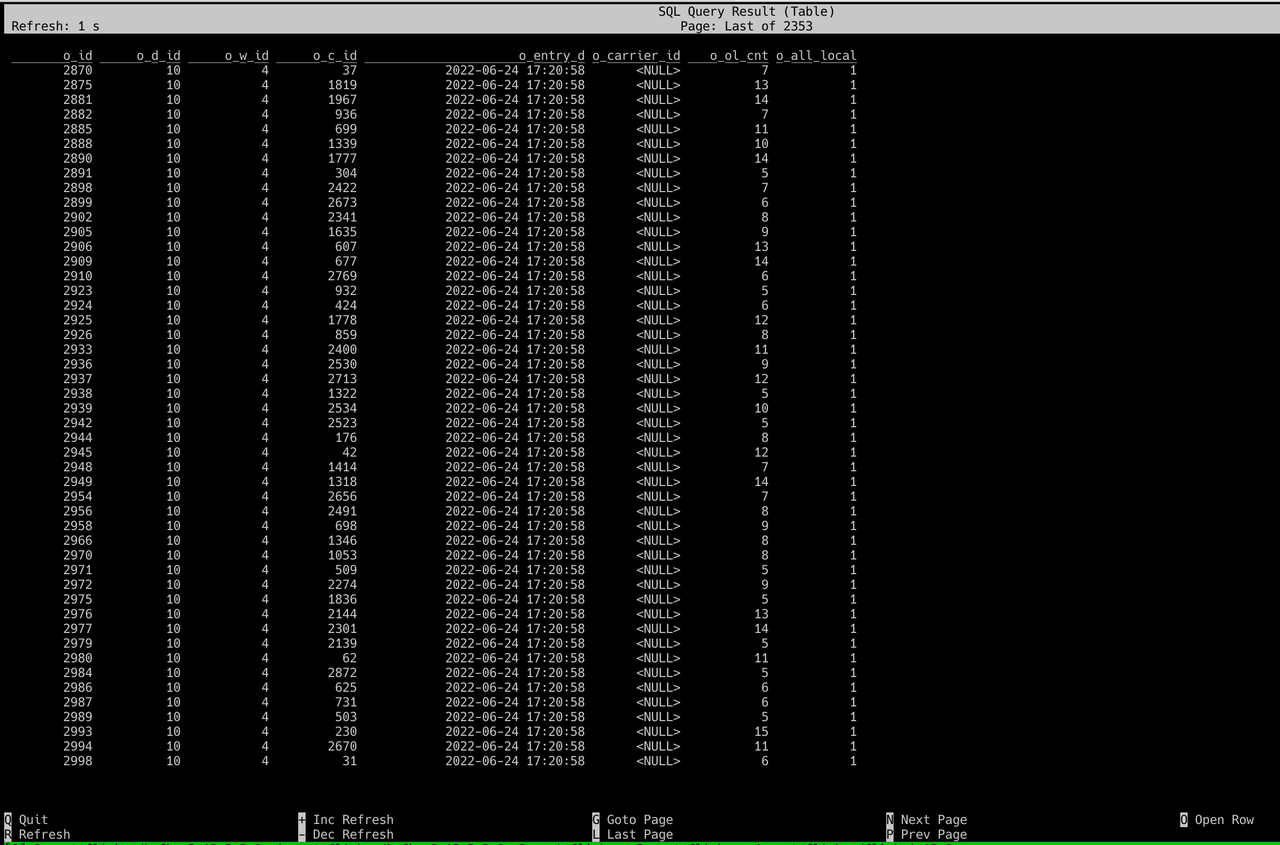
Run the following command to query data of the
tpcc_orderstable:SELECT * FROM tpcc_orders;After this command is executed, you can see that there is new data in the table, as shown in the following figure.

Data integration with Kafka is done.